
April 9, 2020
SolBe Families,
Kiddos are asking lots of questions and feeling the emotional impact of COVID-19 at home. Our lovely Tatiana found a wonderful resource for a few children’s books that can help ease anxieties our kiddos may be feeling or sensing. Click this link for inspiration—many of these books can be found online or on youtube if you are not able to procure a physical copy. On a lighter note, enjoy this hand-washing song from Ramblin’ Dan. Our kiddos at SolBe were very much enjoying singing “Row, Row, Row your Boat” during handwashing at school.
Project of the Day Infants & Toddlers: Edible Finger Paint from MeriCherry. Recommended by our Brown House Educator/Extraordinaire, Ms. Nathalia!
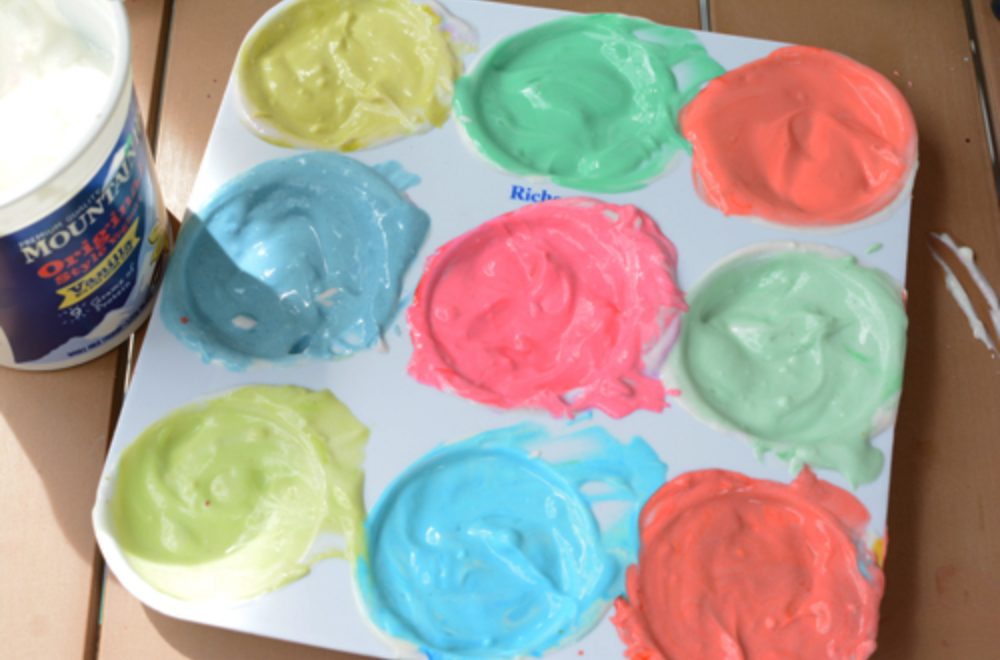
“We are always being asked how to make yogurt paint so I thought I’d show you just how we do it around here. Making baby safe paint is super easy using two ingredients, yogurt and food coloring. The colors always come out beautiful and vibrant and did I mention it’s sooooo easy??!!!
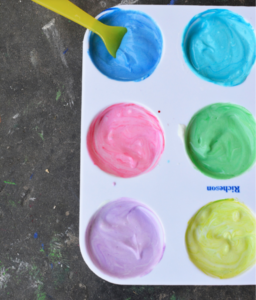
First, enlist the help of your favorite ballerina. If you don’t have a bejeweled little girl obsessed with tutus around, a regular child will do just fine : ) Have ready, a tub of plain or vanilla yogurt, a spoon or two, some food coloring and some containers. We use a paint palette tray. *Tip* Vanilla yogurt is super yummy. If the kids discover that the yogurt is vanilla they will likely eat it, by the paintbrush full. If you don’t want to encourage eating the paint, stick with plain yogurt.

You can find food coloring here if you’re more normal than I am and just order it online. Ask your little helper to scoop out some yogurt into all the little containers you have set up. A few spoonfuls will do. Then squeeze a few drops of food coloring into each container. You just need a few drops. If you add a lot, the colors will be really vibrant but they will likely leave a temporary stain on everything so go light on the drops. I am happy to say I have trained Gigi fairly well in this department.
Once you’ve squeezed in a few food coloring drops into each container, then you just mix it up with the spoon. Kids love to do pretty much all the steps, but mixing is a favorite. I encourage Gigi to mix up the food coloring as she drops it in the yogurt so we can get a really nice variety of colors. It’s a great color theory lesson too.
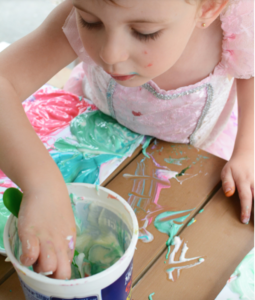
Of course it’s very important to do a little paint tasting as you go.
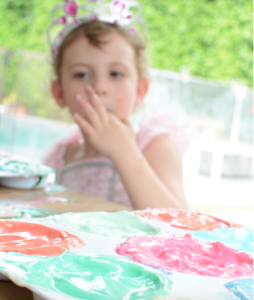
And that’s it folks! Super easy right? Yes, there is a slightly bigger mess than when you do it yourself, but you can do it outside and it’s super fun for kids, so I think it’s worth it.”
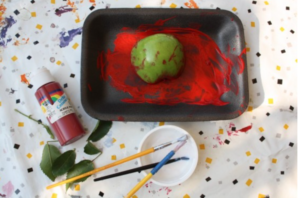
Project of the Day Older Toddlers & Preschoolers: Apple Stamping Activity from Happy Hooligans. Recommended by our GreenHouse Educator/Extraordinaire, Ms. Talia!
“Apple stamping is always a favourite though so it’s one that we do year after year. Last year we stamped fall colours with apples and forks, but this time, we’re being a little more traditional. We’re stamping the good-old-fashioned way with red paint, but we’re adding a bit of tactile interest to our apple prints by adding leaves from the garden.
For our apple stamping activity, you’ll need
- apples, halved
- red paint
- leaves from the garden
- glue
- tray or plate to hold your paint
- white paper or cardboard
Instructions
For this project, I poured a puddle of red paint into a styrofoam produce tray and I gave each hooligan a long, narrow piece of white cardboard to do their stamping on.
Note: Always run your styrofoam trays through the dishwasher to sterilize them before using them for kids’ craft projects.
“Star” apple slicing trick
Have the kids gather around while you cut the apples in half. My guys always love to examine the inside of the apple and see how the seeds are all tucked in there so neatly.
You can cut your apples top to bottom to make a traditional apple shape with your prints, but for fun, you may want to cut one of your apples crosswise to surprise your kids with this star-shape arrangement of seeds. (see photo below)
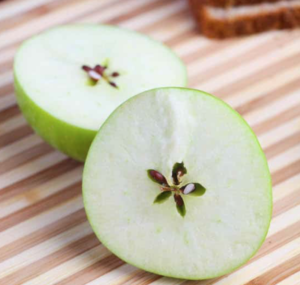
Apple cut crosswise to see seed star formation
The hooligans dipped their cut apples in the paint and then stamped them along their cardboard strips.
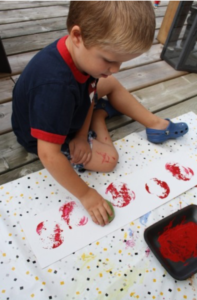
As they made their prints they learned that they could make a darker print if they loaded lots of paint onto the apple and used a lot of pressure when stamping.”

More resources to follow in the coming days. Feedback and more ideas welcome, as always!
Be well and stay healthy!
